
Have you tried stamping candles, it's inexpensive and so easy!

This certainly is not a new technique, it has been around forever

This certainly is not a new technique, it has been around forever
Your first step is to grab your favorite stamps.
I ordered these Paris stamps online from Stampin D Amour, they have luscious vintage stamps. When I let them know I was going to link to their site they graciously offered to include a free stamp with every order before 8/31/11 Just mention you're my friend!
Now grab some regular tissue paper, the kind used for wrapping presents. Stamp your tissue paper using a light hand, if you press to hard your stamped impression will get muddy.

You can use any ink, just test it because some will run on the tissue paper. Now cut out your stamped images close to the graphic

Using regular wax paper, cut a strip
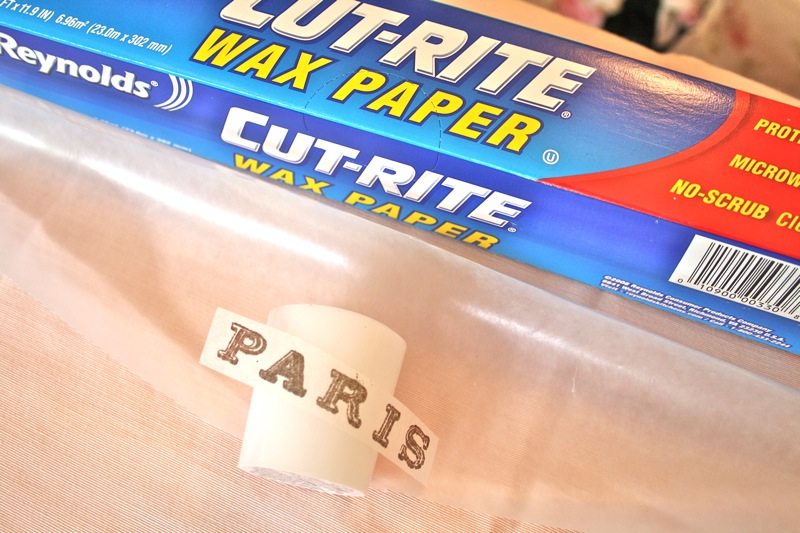
Then wrap it around your candle tight with the wax side towards your candle and the tissue paper graphic underneath

Now use either a heat tool used for paper crafts or a hair dryer and blow hot air over the wax paper that has the graphics under it.
Peel off the wax paper and you have a stamped candle that won't rub off, how cool is that!
This process works because the wax from the wax paper melts into the tissue paper and blends it into the candle
Here's some tips from my trials and errors
The wax paper can be used over and over, just use a new spot each time
If you do not have the wax side of the paper towards the candle you will know right away because the tissue graphic will not stick to the candle
When I cut my strip of wax paper I mark it with a magic marker so I know which side is the wax side. It is easier to tell when it is coming off the roll than when you have used it a few times
When the graphic is stuck to the candle you will know because you will no longer see the tissue paper edges through the waxed paper
Do not heat for to long and melt your candle, you just want to melt the wax off the wax paper
You can lift up the wax paper and check as often as you like, once you have started the heating process the graphic will not move
You can color the tissue paper before you melt it down, say if you want to color in a flower
I put a garden glove on to hold the wax paper when I am heating it because the heat from the hair dryer can get a little warm
I also did some stamping on fabric, if you're interested in some fabric stamping tips let me know and I will cover it in another post

"What the heck is that"?
Well, I made the candles to sell in my booth and I was trying to think of a way to display them........ I lost my mind and had a BIRD brain idea, you'll have to wait until my next post to see what it is.....This is so crazy I am almost afraid to show you!
Happy Creating!
Carol
Linking up with
My Romantic Home
WOW Savvy Southern Style
DIY by Design
This would be a fun craft to try with my daughter. Thanks so much! :D
ReplyDeleteLOVE! Thanks, Carol...I'm definitely doing this this fall...;) Hope all is well!
ReplyDeleteThanks for the Tute! I think I see what you made....can't wait!
ReplyDeleteLove this idea my friend. You and your talents totally freak me out.
ReplyDeleteIn a good way.
:)
xoRebecca
This is so pretty and something I've been dying to try. Thanks for the great tutorial.
ReplyDeleteWow, who would have known this was an easy project, the candles look great. As for you last photo, call me intrigued. :)
ReplyDeleteI can't wait to try this. Thanks for such great tips.
ReplyDeleteYour candles are beautiful! Thanks so much for sharing your fun candle stamping tips.
ReplyDeleteCan't wait to see what that pretty object is! It looks very interesting!
Love these Carol! Thanks for another great tutorial! t. xoxooxox
ReplyDeleteLoving these! I'd love to see the fabric tutorial!
ReplyDeleteThanks for the wonderful idea. I just may use this for a bridal shower I'm hosting!
ReplyDeletewow another great craft,, you're just so creative,, beautiful!
ReplyDeleteA fabric stamping tute would be great!
ReplyDeleteGreat tutorial Carol! I'm trying this one!
ReplyDeleteLooks like you're having a a marvelous summer creating!
Mimi
Thanks Carol for the tutorial.. Can't wait to see what you have created!!
ReplyDeleteLove this, thank you! I have a question, you said that we can color the tissue before melting it; what kind of ink or product should I use?
ReplyDeleteAlso, I am interested in a tutorial of how to stamp on fabric. Again thank you for this tutorial.
NICE!!! I thought you were going to stamp right on the candle!! You are a smart chick!
ReplyDeleteWent to a few garage sales.."they" call to me..I can't help myself!!! Found a smaller chandelier for 20.00! SCORE!
Have a great day!!
Warmly,
deb :)
Another fabulous tecnique that I sure will try! And Carol, of course we want to know how to stamp fabric, ha:) I can't wait to see your next post!
ReplyDeleteHugs,
Jacalyn
www.rmebathproducts.blogspot.com
I'm so excited to try this! What great gifts those candles would make! Thanks for scoring the discount for us. And I can't wait to see what that "thingy" is at the end of your post! :)
ReplyDeletexoxo
Kathleen
How fun! I can't wait to try it! Thanks for the great tutorial!
ReplyDeleteWow!!! Thanks so much for sharing. I LOVE it!
ReplyDeleteM.L.
Carol, you make me smile with all your creative ideas, my "to do" plate is getting full...haha
ReplyDeleteSylvia
I can't wait to try this!! Please tell us your tips about stamping on fabric...you are so full of information!!!
ReplyDeleteThat's a really simple, yet great idea! I REALLY like your Paris stamps....I'm going to Paris in October and am really loving everything Parisian right now!
ReplyDeleteCarol!
ReplyDeleteI feel so silly because I didn't know how that was done! Thank you...it's so neat! Gonna do this for sure. And oh yes...I'd love to know more about stamping fabric. Thank you friend!
Nancy
Thanks for the tutorial Carol...very easy instructions. I LOVE how they turned out and, of course, now I want to try it. :)
ReplyDeleteHi Carol,
ReplyDeleteDoes your mind ever stop creating! I love your stamped candles and I know they will be a hit in your booth.
hugs
Sissie
Thankyou Thankyou, you always give us the best in tutorials. I will try this out for sure. Can't wait to find out what that thing is.
ReplyDeleteGreat tips! You have do such good tutorials.
ReplyDeleteWhat a great post! I have some great stamps and can't wait to try this!
ReplyDeletePaulette, It is so hard to answer people when there is no way to contact them. Hope you read this. you asked how to color the tissue paper. You could use magic marker or a speck of acrylic paint. If I need just a dab of color I will wet a colored pencil. You can add color anyway you like, you just need a dab so it does not run or bleed on the tissue paper
ReplyDeleteCarol
Awesome tutorial, Carol! I just love how you share all of your great ideas and inspirations!!
ReplyDeleteIt was an absolute JOY to spend today with you!!
I hope we can explore another fabulous place together soon!!
Have a lovely Friday! Can't wait to see that display!!!
Hugs,
Becky
You make everything look so easy Carol! Those are super cute.
ReplyDeleteMy son's girlfriend just made some candles! What fun! I can't wait to see what you came up with to display them. I love black tulle, especially around Halloween time!
ReplyDeleteGuess where I was 2 days ago???
ReplyDeleteYour booth!!! It was gorgeous!! So many pretty things!
Btw, I put Antique Mall in my GPS when we were in Winter Park, after leaving your mall, and this CRAZY place, it was a house, showed up. I went inside.. there was LOADS of things t pick and to look at, but, EW!! LOL You just have to know where I'm talking about... right? (There was a tub outside in the yard, with a REALLY big dead snake in it.. ugh, I about died! LMAO)
Sherri
I haven't seen this technique, so obviously, I think you're a genius... I'd love fabric stamping tips. I think I can see where your "bird" is going, very silly. Lastly, did you see this post? An old cuff was used around the neck of a jar/vase--it reminded me of something you would do! http://fadedcharmcottage.blogspot.com/2011/08/pretty-in-pink.html
ReplyDeleteCarol I stand amazed, what a marvelous and wonderful idea and one I will give a try later this Fall for the craft show I will be attending in November. I just love your blog and always stop here first to see what wonders you have been up to....thanks again for giving such clear, concise directions for a craft.....big hug sent to a sweet lady!
ReplyDeleteTina xo
had to come back and tell you my sissy REALLY DID pull that mannequin body out of the trash. Tennessee has the most amazing JUNK and people don't even know about it!
ReplyDeletexo~Rebecca
I have no more words for you Carol...but I have to comment... (*_*) You know I think you're awesome! ~Stacy~ xo
ReplyDeleteCarol,
ReplyDeleteThanks Carol, that is so cool!! I wondered how that was done, know I can make my own French Script Tapers!! I thought the Candle was just rolled over inked stamp. I have that set of stamps and will show you soon what I did with them. Have a Great Week~end Carol!! I have to go trase Rebekah now about Garbage Picking in Tenn.(He,he)
Huggs, Nancy
These candles turned out very charming; thanks for the instructions.
ReplyDeleteThis is a new to me technique, but I can see many possibilities to decorate with them. Thanks for sharing your creative idea with us. Can't wait to see your bird project too!
ReplyDeleteI am so copying this idea! :) Your tutorial is perfect. Thank you for sharing your tips and techniques. :)
ReplyDelete~Liz
How simple yet beautiful! I am going to do this with my Girl Scout troop. Thank you for the idea!
ReplyDeleteThe candles look great Carol. Thanks for the tutorial.
ReplyDeleteThis one is going on my list of things to do. As always, your tutorials and ideas are the best! Thank you.
ReplyDeleteCarol,I probably could do this. Love all the creations.
ReplyDeleteWould you be so kind to (& tell your friends) comment on my BLOG ONLY (emails don't count), for the Miracle Makeover fund drive. Charlie, 8 yr. old, & his story are fabulous. Every comment brings us a $1 for the next person that will be sponsored.
Have a beautiful weekend.
Hugs,
TTFN ~
Marydon
blushingrosetoo.blogspot.com
I think this is marvelous! I would love to see a post about the fabric stamping, too.
ReplyDeleteAnd now, I wait to see the rest of the story regarding the last shot.
I agree this is marvelous! I would love to try this and give them as gifts. Great idea!
ReplyDeleteWhat a great project. I have to try this one. Thanks for sharing at my Sizzle into Summer party.
ReplyDeleteTHIS IS SO COOL!!!! I just love this, Carol! I'm always looking for new crafts to try out, and this is going at the top of my list! Thanks for sharing a wonderful tutorial!!!! :) You rock, girl!
ReplyDeletexoxo laurie
LOVE IT!!! I think I might have to lift that idea..thank you for sharing..
ReplyDeleteLooks terrific.You make it sound so easy I'm determined to try it.Thanks for sharing.
ReplyDeleteI love this idea! Thanks for sharing such a great tutorial! Your candles look great!
ReplyDeleteHi there- found you through the hop and am a new follower. This sounds so easy! I love the idea of personalizing candles for the home or as gifts. I hope you have time to follow my life in South Africa by http://withoutcomplexities.blogspot.com
ReplyDeleteI hope you have a great week!
You have a beautiful blog. This looks great. I would love for you to stop by My Dream Canvas. Take care Anu
ReplyDeleteGreat tutorial and love how the candles turned out :)
ReplyDeletethank you!!!!
ReplyDeleteblessings
barb =)
Thanks so much for your wonderful directions!
ReplyDeletexo,
Dee
Awesome tutorial and I can't wait to try! Just one thing that's not mentioned here. I think the image on the tissue paper should be placed face down on the candle so that the image transfers to the candle when wax paper is melted from the back?
ReplyDeleteYou are a genius! I can't wait to try this!!
ReplyDeleteHigh-quality candle molds and supplies for DIY candle makers and businesses. candle making supplies
ReplyDelete