July 30, 2012

Projects For The Wedding Rehearsal Dinner

Many of you have asked how the wedding plans were going, I can't believe my sons wedding is less than 4 months away!  So, I thought I would show you a couple projects I have been working on for the rehearsal dinner


The Rehearsal dinner will be at a local outdoor cafe around the corner from my house.   It's where the kids spent a lot of time when they lived in Orlando before moving to DC.  This is going to be a vintage themed, relaxed, dress for the weather, (Pretty nice weather in Orlando in November) dining under the stars, event. 


I made one of these vintage book candle holders way back in November right after the engagement.  Yep, crazy excited Mom...... I was already planning the rehearsal dinner in my head.


I was trying to think of something unique and different for table centerpieces that stayed with the vintage vibe, the full tutorial is HERE.  After I drilled out the holes for the candles and decorated the cover I added ribbon and vintage brooches.....A little shabby and a little bling!


The books will be center pieces on the large tables. For the smaller tables and scattered around the venue I made waterslide decal pictures of the love birds and put them on votives.


The waterslide decal tutorial is HERE, I printed pictures on the decals then put them on votives


I have a lot more wedding projects to show you.....Hope you don't mind a little wedding DIY between "Regular" DIY!?

Happy Creating!
Carol

July 26, 2012

Fabric Backed Shelves, From Drab To Fab

Bookcases and shelving units sell well in my booth and if I add a back to them they sell even better....And if I do something special to that back....Well, they sell even BETTER!


This time I decided to add fabric dipped in starch

I took this very average thrift store shelf


And a favorite Mary Rose fabric dunked in starch...A full "Fabric and Starch" tutorial post is HERE and should answer all of your questions.


I laid the fabric soaked in starch over a board I cut to fit the back of the shelf.  When the fabric dried I used my brad nailer and attached the board to the shelf


While I was on a fabric and starch roll I did this shelf too


I loved the yellow color, so I dug out some yellow floral fabric, then cut the backboard out of a thin board I had laying around


Dipped the fabric in starch and let it dry on the board 


Then with Billie's help (She's actually no help at all, but when you're that cute you don't need any skills) I brad nailed it to the back of the book shelf


This was a really easy way to dress up the shelves


Both are headed to my booth at Orange Tree, I haven't decided what to charge....


......But, whatever I decide it will be more than I would have charged before I gave them a backbone!

Happy Creating!
Carol

July 23, 2012

Painting Metal Frames and Google +

I wanted to pick your brains about Google + but, first I'll show you a little transformation


I love when I find these old Italian frames with the domed glass, they are always a great seller in my booth at Orange Tree


I've tried selling them just as I find them, but they don't sell


Until I give them a couple coats of Rust-Oleum Heirloom white paint and a slight sanding


The Rose prints are from a 1983 Avon calendar book


I put these in my booth at Orange Tree


And priced them at $12 for the large ovals and $6 for the small ones...I actually sold one as I walked in the door to put them in my booth.


Now, Help me out here with Google +....I have a few readers, Sue E., Claudia, Kathy, and a few others.  You leave the nicest comments and I feel so bad that there is no way I can get back to you!  When I click on your name on the comment you left I get the Google + profile............ 


Since I am not in your "Circles" there is no way to get to you or your blog and you are "Blogger no reply"


Now, there is some Google + profiles I can get to, when I click on "About" in the profile their blogs show up, I can then click on the blog title and leave a comment


If you have left a comment on my blog and I have not returned the comment (I reply to every comment unless you have a post I have already commented on) please hit my email button or  leave your blog name or email, it honestly keeps me up at night when someone has been so kind to take the time to leave a comment and I cannot get back to you or your blog


I imagine if I can't leave a comment, no one else can either?  


If anyone has any suggestions about this new Google + format, share your knowledge, we'd all appreciate it?


UPDATE- Thank you to Kathy and Claudia, here is what you have to do if you have Google +.  In your profile the "About" section, you have to input the information, that way when we go to a google + profile we can click on "About" and your blog address will appear! 


Happy Creating!
Carol

July 19, 2012

Painting A Union Jack..... The Real Story

OK, so here's the deal, some projects are so fun I can't wait to do them again and some projects.........Well, lets just say this is the last Union Jack Project you will see here!


I found this cute little stool at an estate sale and it was already blue and you can see the red peaking through.  I bought it the same weekend as the Queens Jubilee, so I was all into the Union Jack


Ok, so here is the problem, I, like many of you thought the Union Jack was just a cross with an X through it.......NO, there is some slight nuances with the X that make it difficult and tedious to paint

Click HERE for a great tutorial on drawing a Union Jack

Now, look close at the X, the red line is not centered in the white

Pretty funny, I thought every Union Jack I saw painted on blogs had messed up LOL!


Oh and this will take you a roll of painters tape...Tape, paint, wait,  tape, paint, wait, repeat ZZZZZ.   


I sanded and waxed it to bring out the undercoat of red paint then put it in my booth at Orange Tree for $28

To my UK Friends, I love you, and I love the Union Jack.....I just don't loooooove painting it!


Have a great weekend

Happy Creating!

Carol

July 16, 2012

Ornamental Plaster Appliques Made in Gum Paste Molds

I found some gum paste molds that work great for making plaster appliques 


I showed you HERE in a previous post how to make molds for plaster appliques using polymer clay, still a great option since it gives you the ability to make unique appliques


But, this is pretty easy too.  These Wilton gum paste molds are priced at $9.99 at JoAnnes (Of course we never shop without our coupon)  And there is a huge selection of designs


These work great because they are flexible and the plaster pops out when hardened.

Dust the mold with any powder or corn starch


Then make up some plaster to about the consistency of pudding  (Plaster is available at any craft store) and pour it in your mold
Oh ya, this is a really precise step as you can see


Now lift the mold up and drop it a couple times to get the air bubbles out.

Here is the important part, to get the appliques to lay flat on your project, go over the mold with your shiny new (Or crummy old) putty knife


Let it dry, pop them out and glue on your project, I used E-6000 glue for this shelf.  

This is an optional step, but you can go over the applique with gel stain or brown paint, it just made it easier to cover with paint when it was the same color as the shelf


A little oops paint, brown glaze, and sanding and you'd never know this little vintage hand crafted shelf did not originally come with a decorative element


That's it kids, couldn't be any easier if you wanted to add a little something to something!

I'm going to put this in my booth Orange Tree and price it at $28

Happy Crafting!

July 12, 2012

A Sweet Stenciled Table and Blogging...How Do I Do It!

I admit stenciling a table is not a real WOW, it's just that sometimes you get just the right table, stencil, and paint.....


 ....And the finished project turns out nice enough to share

I haven't stenciled in a long time, but then my subscription to "Do it Yourself" arrived and it came with a bonus magazine "Fun with paint" loaded with stencil projects
  (This is not a sponsored post)


So, when I was trying to figure out what to do with this little table


I decided to "Get my stencil on"

I painted the table with ballerina pink and used my Martha Stewart Stencils


I filled in the stencil with the grey paint that I had special mixed at Ace for my desk transformation


Then I finished the top with a clear coat of wax


And put it in my booth at Orange Tree, priced at $32


Now to switch gears...If you think you could tolerate any more of my yapping for one day, here's a preview of my guest post at...

.....Kathy at Delightsome life.  She asked if I would 
contribute to a series she is doing called


"Blogging...How do you do it"


Thank you for asking Miss Kathy, this was so fun because I've never given the process 
of "How I blog" much thought.  Here at The Polka Dot Closet I have a pretty relaxed 
approach.  I love blogging, I often say "I'm having more fun than a girl deserves"! 


You can see the complete post HERE


And


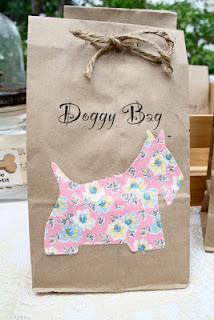
Remember when I did the post on my "Doggy Bags",


 That post is a guest on "Cozy Home Scenes", Shannon is doing a series  called "Paws and Claws"  How cute is that!  If you missed it you can see it HERE


Happy Creating!
Carol