May 30, 2012

Making A Faux Italian Chandelier With Porcelain Flowers

Have you seen those Italian chandeliers with porcelain flowers?  I thought HUMMMM....I wonder if I could make one?


I always keep my eyes open for nick nacks with BROKEN flowers (I don't want anyone to think I am chipping away at good pieces).  I picked this one up for $1.00, some flowers where chipped, but there was still good flowers left


HERE is the very first post I ever did showing how to chip these flowers off


Now, I took a thrift store light and sprayed it with Heirloom white paint by Rust-Oleum.  Then did a light sanding


I used E-6000 glue to put the roses on, then wrapped painters tape around the rose and let the glue dry for 24 hours


AH!  Success.... it worked!  They are on nice and tight!


I covered the white light shafts with paper I got by copying fabric, the tutorial for copying fabric is HERE.  I used double sided tape to adhere the paper


I couldn't resist hanging some pink crystals.  HERE is my inexpensive source for crystals


Geez, I really had trouble photographing this chandelier, I tried inside, outside, bright sun, cloudy......I gave up!  No awards for photography here!


But, you get the idea!


This could also be done with polymer clay roses


The Tutorial on making clay roses is HERE


I am going to put this in my booth at Orange Tree and I think I will charge $85-$95.  If it doesn't sell right away, that's OK, I think it will be pretty hanging around

Let me know if you are interested in how I made the shades


Happy Creating!

Carol


How To Make A Flower Pin

The flower pins I made for the Fancy Flea were a huge success


I have used this basic flower on, bags, hats, pillows, and brides bouquets, but I had never made them into pins


The full flower tutorial is HERE

I start out by making tons of petals 


Then had fun putting them together.   I added lace, feathers, tulle, and vintage jewels


They look so cute on sun dresses, summer shirts, and hats


I finished them off by hot glueing felt and a pin on the back


I priced the pins at $10 and sold them all in 7 hours

Here they are ready to go to the flea, I pictured them with the flowered bridal and bridesmaids bouquets I made.....OK, who's suffering from flower overload?


Yep, my lace dress form was stripped naked by the end of the Flea


I just made some for my antiques booth, I'll see how they sell since it's a completely different venue than the Fancy Flea


One little flower.....So many uses!

Happy Creating!
Carol

May 29, 2012

Lace Folding Screen

I'm loving this lace folding screen, now what am I going to do with it?


I didn't get a before picture because I didn't think the "After" would be "Blog worthy", but I thought it turned out so pretty that I wanted to share it with you


It was originally a brown metal folding screen with canvas inserts, I removed the canvas and spray painted it with heirloom white


Then it sat in my garage as I contemplated what fabric I should use for the inserts........Ding Dong.......My neighbor comes to the door.  "I just took these lace curtains down in my bedroom and I was wondering if you would like them".........."I've had them for years every since we moved in the house, I guess that would make them vintage" ....What..I'm one lucky girl!


All I did was put a hem in the bottom, the top was already finished for curtains rods


I made a flower from lace and then pinned it on so it could be easily removed  

Ok, I love it.... it looks great, but now what am I going to do with it?  When I bought the screen it was in 4 pieces and I did not realize how big it was.  It's tooooo big to fit in my booth at Orange Tree and I have no room for it in my little house.  The only thing I can think of is to try Craigslist, I have sold a few things on Craigslist in the past.  My experience with Craigslist is that I have to practically do a "Curb alert" (That's where you put a post on Craigslist when you are putting something on your curb) to get rid of something.  So, short of getting a bigger booth do you have any ideas, whats your experience been with Craigslist?

Have I told you lately how much I appreciate you...I really do!    

Happy Creating!
Carol

May 27, 2012

A Fellow Blogger Needs Our Help

Can you imagine if you woke up one day and "Poof" your blog disappeared!

Well that's what happened to my friend Laurie.  Her blog "When The Bough Breaks" disappeared!  I was wondering what happened to Laurie, then the sweet "Nana Diana" found Laurie and her new blog titled "In My Dreams I See".  It's a perfect title for Lauries blog since due to a senseless accident (She explains on her first two posts) Laurie is slowly losing her vision, but this is not a "Pity me" blog.  This is a blog about a very talented artist, who when the light of day is "Just right", can see well enough to paint gorgeous works of art, that I can only do in...... "My Dreams" 


What draws me to Laurie the most is not her works of art, but the pictures she paints with her words.

If you were following Laurie, I know she will be happy to welcome you back and if you don't know Laurie, I know she would be happy to welcome you in!


Happy Creating!
Carol


May 21, 2012

A Sweet Little Telephone table

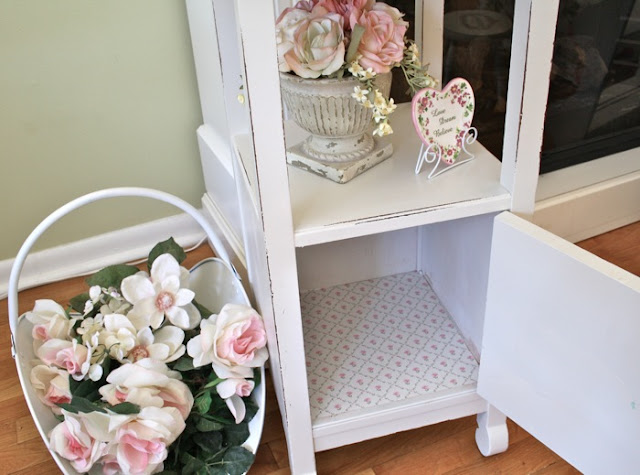
This is a sweet little telephone table makeover. 
 I figured since I did the brown suitcase on my last post I could show you a "Hurt your teeth its so sweet" project.


I took this cute little brown table and painted it with Heirloom white 


Then I added a water slide decal, the graphic is from Graphics Fairy, I photo shopped in the rose


I wallpapered the inside with Vintage Laura Ashley paper


Then added my homemade polymer clay Paris knob, the tutorial is HERE


I priced it at $45 and it sold in a day


.....Hum maybe I priced it to low, you never know, had I priced it higher it might have taken months to sell


OK, was that tooooo sweet, are your teeth hurting?


Happy Crafting!


Carol

May 17, 2012

Suitcase Table

I've had this idea floating around in my head for a long time.  I saw a suitcase made into a table somewhere and put it on my long...."Someday I have to try this list"...Yep, now I can check it off!


I found this suitcase for $1 and the table for $5 so this project had a grand total investment of $6


I never buy legs, I always look for an inexpensive table and take the legs off.  I really liked these legs since they were attached to a board and I thought it would give the suitcase good stability.  Of course you could attach any legs.

  
I screwed the legs onto the bottom of the suitcase using a washer on the inside of the suitcase so the screws wouldn't pull through.

Ok, on to the inside.....Houston we have a problem....This is what you get for a $1


But the lining came out easily, then I washed it with bleach and sanded the inside.   The inside of old suitcases are lined with a thin wood that could be stained, but I had another plan


I used the ribbon from the suitcase used for securing clothes as the hinges to keep the suitcase open.  They were glued in place with E6000 and clamped overnight.


Now, let the fun begin! 

I took old book pages and ran them through my printer, I used graphics from my personal stash and some from Graphics Fairy


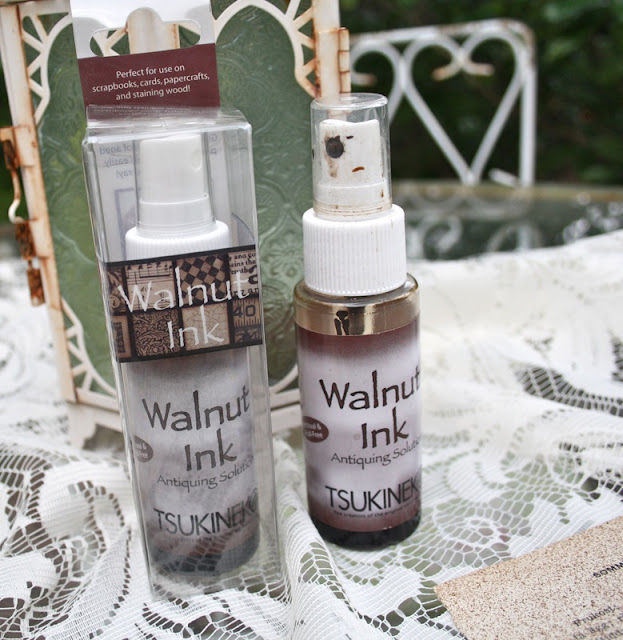
I Mod Podged these sheets inside the suitcase and then sprayed Walnut Ink to give them a more distressed look


Yep, open or closed, in the right setting it would be a great bedside or coffee table.  I can see it being used to store reading material and remote controls


So, what am I going to do with this????   

I am going to use this at the rehearsal dinner, you see my son is getting married Thanksgiving weekend and the Mama of the groom.....Me..... is responsible for the rehearsal dinner.  This dinner will be vintaged themed like the wedding...Yea!

Shoot,....... I can't tell you exactly what I am going to use it for because only 3 people in my real life read my blog and two of those are my Son and future DIL and I want some elements of the dinner and decor to be a surprise. 


I promise I will show you pictures of how I used it after the rehearsal dinner....A cliff hanger for sure LOL!

Happy Creating!

May 14, 2012

French Market Bags

Oh, we love all things French!  I thought I would show you my latest batch of French Market bags


I did a tutorial on making them Here.  They're so easy to make and can even be done with no sewing.


I Originally got this idea from Sissies Shabby Cottage........Take a look at her gorgeous bags!

These were made with vintage rubber stamps I got at auction


I used fabric stamping ink so the bags can be washed with no worry of fading


I love this graphic I got from a site called Free Vintage Digi Stamps loaded with tons of free fun graphics, HERE is the direct link to the one I used


The one on the left was made with T Shirt Transfer paper, I got the vintage look by taking the transfer paper off after just a short ironing (I love the vintage look).   The one on the right I printed on a fabric sheet called Quick Fuse then cut out the image and ironed it on


Here's another comparison, on the left is the quick fuse, on the right, T Shirt transfer paper.  The dancer is a graphic from Graphics Fairy


You'll have so much fun making these


Hang with me while I work on a blog face lift.  I have not done a thing to my blog since I started 2 years ago (I hate change) but, it was time (My son told me) to freshen it up a little......That noise you hear....It's me dragging my feet.


Happy Creating!
Carol


I am joining
 Coastal Charm Nifty Thrifty Tuesday