April 28, 2013

Vintage Wedding Veils


I love vintage wedding gowns and veils


So imagine this heart stopping moment.... A few weeks ago I went to a Girlie, girl, Estate Sale and as I was checking out with tons of vintage slips and clothes 


There.... Right by the cashier, was a pile of vintage wedding veils.   Ah...Ah..."Are those veils for sale"?  "Yes, they are"!   "I'll take them all"!  The price was so great that I got in my car and sped away before the estate sale police got me! 


This one has a beaded headband with a gorgeous lace trim


There is an elastic headband on this one with little flowers on the side.  


When I showed it to my Mom she said 
"It's not exactly my style" lol.... I agree!


This was a straw like cap with vintage flowers


I love this beaded cap..1940's?


Oh, the stories they could tell

But WAIT, this story is not over!  Three special blogging friends are also showing off there vintage wedding veils


You can never see to many veils.  So, please stop by, say hi and make a new friend.

Happy Creating!
Carol

Joining 
Ivy and Elephants

April 24, 2013

Tussie Mussies In Bed Spring Holders

Tussie Mussies and bed springs

Only Me... "Miss Fluffy" Would buy rusty bedsprings and then decided to fill them with lace and flowers


A while back I was at this big antique extravaganza and bought some old bed springs


I had no idea what I was going to do with them, I thought maybe something rusty and industrial....Who am I kidding, I can't help it, I'm just all about fluff!

So I made up some Tussie Mussies and added my fabric flower ...Tutorial HERE


Nothing better than a little rust and lace.....


.....And white roses


I thought with Mothers Day coming up I would put some in my booth at Orange Tree and a few in my online store The Polka Dot Closet 


I don't know if you sense it or not, but all I do is play everyday and nothing makes a better play day than lace, flowers, and ribbon.

Happy Creating!
Carol

April 22, 2013

Covering A Lamp Shade With Lace

I love the look of lace covered lamp shades


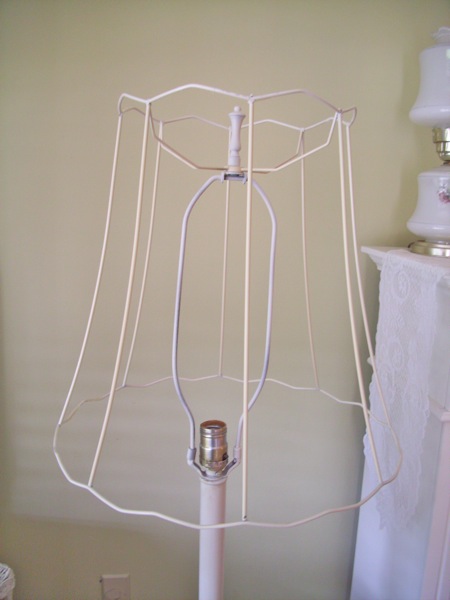
I started with a thrift store pole lamp table


Then sprayed it with Heirloom white paint


I actually thought this is all I would have to do since it had a really nice shade, but....No, that would be to easy!


So, I took the fabric off the shade and started covering it with lace.   

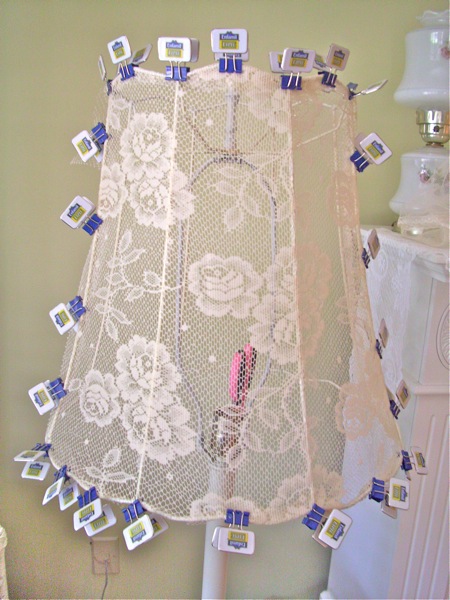
To get the lace tight I only covered 3 sections at a time using Fabri-Tac glue and clips (You could use clothespins) to hold it while it dried.  Lace is very forgiving, you can't see where the seams overlap.


After it dried I trimmed the lace close to the wire of the shade then glued a vintage lace trim around the top and bottom


And I was done


 I put the lamp in my booth at Orange Tree and priced it at $95


The shade was not difficult to do, it just had to be done in stages, glue and wait, glue and wait.... I'm good with the glue part just not good with the wait part!

Happy Creating!
Carol

April 18, 2013

Altered Bottles and Mirror trays

Last month I sold 10 of my altered bottles in my antiques booth at Orange Tree 


I love vintage bottles and they are really good sellers right now.  I say "Right now" because a lot of my customers are "Regulars" and I find that something that is hot now, might not be in a couple of months, because all of my "Regulars" may have already bought one.


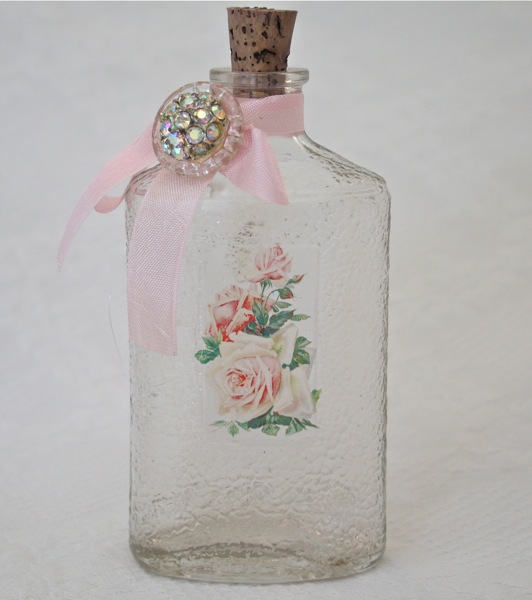
I added a waterslide decal to each of them. You can purchase the decals at The Polka Dot Closet Store, or you can make them yourself, the tutorial is HERE.   My new sheets of decals have graphics from antique calling cards I purchased at an antique store and from Free Vintage Digi Stamps


I added some ribbon, lace, and sometimes a little bling


I get the corks at the craft store and dye them with Rit brown dye to give them a little age

Here they are all sitting on a mirror tray that I spray painted with heirloom white and then added a porcelain rose I chipped off a damaged nick knack..The tutorial is HERE


I sold 5 trays last month with porcelain roses on them for $25 each.  If I do not add a rose I price them from $16-18

In the picture below you can see that I also added a porcelain leaf, I usually add one or two leaves with the rose


So there you go kids...


....Just passing on what's selling in my neck of the woods.  I have a few vintage bottles for sale at The Polka Dot Closet 


Happy Creating!
Carol

April 15, 2013

Transforming A Toy Box

I use a toy box in front of my couch as an ottoman, of course it is filled with magazines, blankets and cat toys.  They are great storage coffee tables too!

I found this one for my booth and did a quick transformation


Here is how it started, it looked fine but, I know what will sell in my booth at Orange Tree...So, I painted it with Heirloom white 


Then enlarged two different graphics from Graphics Fairy and transferred the graphic with the blender pen method explained HERE.


I think I priced it around $55.00

I wanted to show you another quick transformation...It's two for one today! 


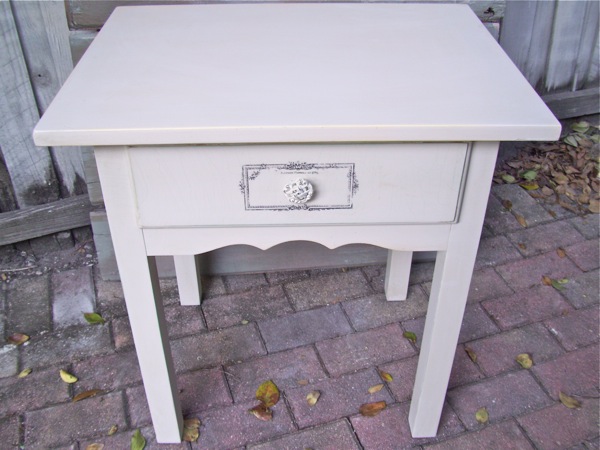
An ugly little desk got a coat of white paint.....


.....But still needed a little something so, I used a frame graphic from Graphics fairy and applied it with a blender pen around the knob

Just throwing out an easy quick idea if you have a transformation needing a little something!

Happy Creating!
Carol

April 11, 2013

The Perfect Shabby Cabinet

I love, love, love, this!!!  As a matter of fact, when I finished transforming this little cabinet..... I knew I had to keep it.


My daughter in law was visiting for a week and we had sooo much fun thifting, junking, and antique store shopping....Oh my, we got tons of great stuff!

I couldn't wait to start on this little cabinet we found for $20 in a junk yard


It was a little plain so I added, plaster beads down the side, they were made in a gum paste mold, tutorial HERE.  Then I added two plaster roses, tutorial HERE.   And finished with spackle cake decorating on the outside of the roses, tutorial HERE.


Now's when it comes to life!!!

 I used homemade chalk paint which was a mixture of plaster of paris, a touch of water, and heirloom white paint.


Then finished with dark wax to bring out the flower and bead detail.  I used Annie Sloan dark wax which I mix with clear Minwax. I find the AS wax too dark on it's own, so I lighten it a little with the clear wax.

Almost done.........For the finishing touch I added wallpaper to the interior


Then stood back and fell in love!


Now, where to put it?  My house is so small that I can't add anything unless I get rid of something......Hum...How about here? Ugg on the air vent, a necessary ugly?


This wine rack was a gift from my son many years ago so, I'm not getting rid of it, just storing it in the attic for awhile.

I think the cabinet looks perfect here under my teapot picture.  I saw that picture on my friend Sissies' blog a couple years ago.  I loved it so much I ran right out and bought it.


Guess what.......The wine fits perfect in my little cabinet!  


Momma's got her wine!!! 

Actually, I don't like the taste of wine lol!   But, every time someone comes for dinner they bring a bottle, how sweet is that!


I'm in love!


Yep, I'm keeping it!  I seldom keep furniture pieces that I buy with the intention to flip and sell

Those of you that sell, how often do you finish a project and decide to keep it?

Happy Creating!
Carol

PS:  I am going to do a post on vintage wedding veils on 4/29.  If you have vintage wedding veils and would like to do a post on the 29th email me and we could all link our posts to each other.